
Vertical Shmup - Part 5 - A framework for enemies
- Bruce

- Aug 2, 2022
- 7 min read
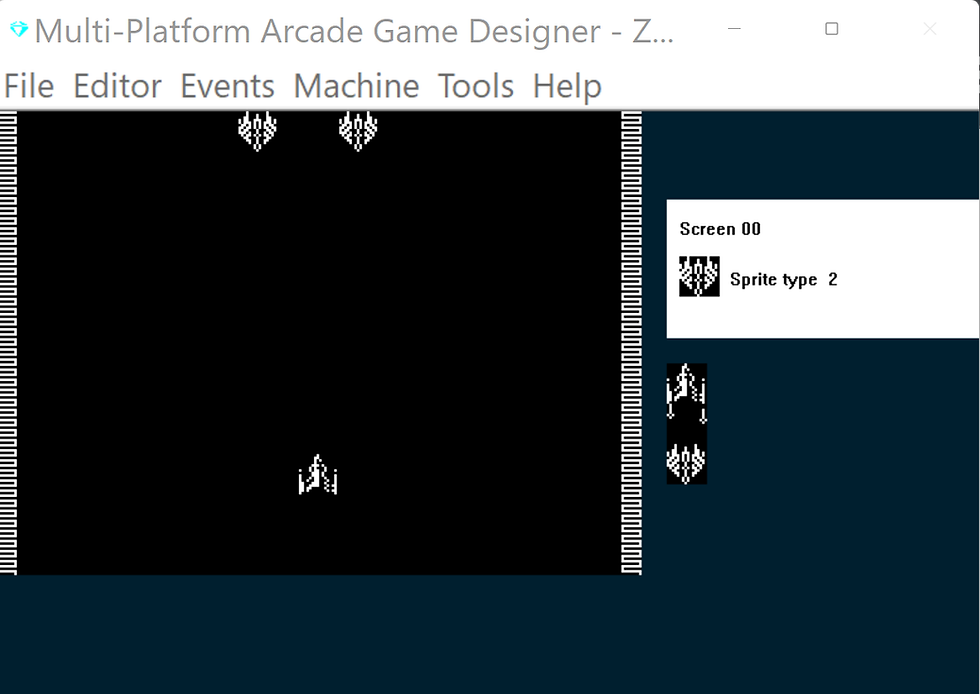
To start with, I'm going to create an Alien Ship sprite then write some code for its movement.

In the first attack wave I want a stream of these guys to appear from the top of the screen, travel straight down and then veer off to the side of the screen.
I want the alien stream to appear from two locations at the top of the screen, one right of centre and the other left of centre.
The stream on the right should veer off to the right edge, and the stream on the left should veer off to the left edge.
To start with though, lets just get the basic movement sorted, We'll use Sprite Type 2 for this alien:
MENU: EVENTS > SPRITE TYPE 2
IF IMAGE 2					; ALIEN 1 image
	SPRITEINK 4				; green

	IF DIRECTION = 0			; initial direction (setup)
		IF X <= 128			; is alien on left side of screen?
			LET DIRECTION = 1	; yes, set its direction to 1
		ELSE
			LET DIRECTION = 2	; no, set its direction to 2
		ENDIF
	ENDIF

	IF Y < 80				; is alien above the 80px y line?
		SPRITEDOWN			; move down
		SPRITEDOWN			; and again (faster)
	ELSE						; alien is below the 80 px y line
		IF Y < 120			; is it betwwwn 80 and 119 y?
			IF DIRECTION = 1	; yes, is it on the left side?
				SPRITEDOWN	; yes, go down
				SPRITELEFT	; and go left
			ELSE				; no, its on the right side
				SPRITEDOWN	; so go down
				SPRITERIGHT	; and go right
			ENDIF
		ELSE					; alien is below the 120 y line
			IF DIRECTION = 1	; is it on the left side?
				SPRITELEFT	; yes, go left
				SPRITELEFT	; and left again
				SPRITEDOWN	; and go down
			ELSE				; if its on the right side
				SPRITERIGHT	; go right
				SPRITERIGHT	; go right again
				SPRITEDOWN	; and go down
			ENDIF
		ENDIF
	ENDIF

							; BOUNDARY CHECKING
							; ===================
	IF X <= LEFTEDGE			; if alien reaches the left edge
		REMOVE				; remove it
		SUBTRACT 1 FROM S		; decrement the sprite counter
	ENDIF

	IF X >= RIGHTEDGE			; if alien reaches the right edge
		REMOVE				; remove it
		SUBTRACT 1 FROM S		; decrement the sprite counter
	ENDIF
ENDIF
Now, we'll add two of these guys to our Screen, we'll put one left of centre at the op, and one right of centre and set each one to Sprite Type 2. The code above should figure out where each one is, and set their movement accordingly
MENU: EDITOR > SPRITE POSITIONS
Let's build the game and see what happens
{INSERT VIDEO}
OK, that's not too bad, we can refine an improve them later.
But first we have a bigger problem to solve. How can we get a stream of these guys to appear?
I could simply create a screen for each level, design some sprites, write some movement code, and use sprite positions to define their starting positions, but I don't think that would be the most efficient use of of the available memory.
I'm going to take a different approach, I am going to define a Spawner Sprite, this will be an invisible Sprite whose job it is to place enemies on the screen at the right time.
The spawner needs to have unique properties such as:
Whether it is in a fixed position or whether it moves
Which aliens it spawns (their image and sprite type)
How long should it wait between each spawn?
How many aliens should it spawn in each attack wave / level
This is an ideal scenario for storing each of these properties in a DATA table and then READing them as required.
First though, let's create the Spawner sprite by creating a new sprite with a blank image.

Before we start coding our Spawner we'll create a new variable 'L' this will contain the Level of the game, so it will start at 1, the first level, and then progress as the player defeats each attack wave.
MENU: EVENTS > GAME INITIALISATION
EVENT GAMEINIT

LET L = 1			; Level (starts at 1)
Next we'll define the Spawner in Sprite Type 7 and write some code:
EVENT SPRITETYPE7

						; SPAWNER
						; ============

IF SETTINGA = 0			; first time we run this
	LET JUMPSPEED = 0		; reset the enemies spawned counter
	LET SETTINGB = 0		; reset the timer
	RESTORE				; start from the beginning of the data table
	REPEAT L				; get the data for this level
	READ AIRBORNE			; get the spawner movement
	READ X				; get starting x position
	READ Y				; get starting y position
	READ J				; get the enemy sprite type
	READ K				; get the enemy image
	READ E				; how many enemies in this level?
	READ G				; delay between releasing each enemy
	ENDREPEAT
	ADD 1 TO SETTINGA      ; prevent this running again
ENDIF


IF SETTINGB = G			; has timer reached the delay point?
	IF JUMPSPEED < E		; are there still enemies left to spawn?
		IF S <= 8	; are there 10 or less enemies already on screen?
			SPAWN J K			; spawn an enemy
			ADD 1 TO JUMPSPEED	; increment the number spawned
			SPAWNED				; switch to the enemy sprite
			LET DIRECTION = 0		; set its initial direction to 0
			ENDSPRITE			; retrun to the spawner
		ENDIF
	ELSE					; all enemies in this level have been spawned
		ADD 1 TO L		; get ready for next level
		IF L = 2			; have we reached the end of the levels?
			LET L = 1	; yes, start again
		ENDIF
		LET SETTINGA = 0	; GET DATA FOR NEXT LEVEL
	ENDIF
	LET SETTINGB = 0		; reset the timer
ENDIF

ADD 1 TO SETTINGB			; increment the timer


DATA  0 165 8 2 2 5 12
OK, this is where its going to get a bit more complicated but bear with me, I'll try and make it as simple as I can. We're going to use some of the lesser-know features of MPAGD which aren't available in regular AGD or even AGDx - but once you get your head around them I guarantee you will start to create better games.
I'm talking about READ and DATA. I've used these extensively in every game I've released, they've helped me save memory, write better code, create interesting new mechanics and more. They are, in my opinion, the best features of MPAGD.
What the code above essentially does is:
When the spawner first appears, read the first number from the DATA table and put it into the sprite variable AIRBORNE (I'll explain in a bit!)
Read the second number in the data table - this will be the Spawners X position
Read the third number in the data table - this will be the Spawners Y position
Read the fourth number in the data table - this will tell us the Sprite Type number of the Alien that will be spawned
Read the fifth number in the data table - this will tell us the sprite image number of the Alien that will be spawned
Read the sixth number in the data table - this will tell us how many enemies need to be spawned in this attack wave/level
Read the seventh number in the data table - this will tell us how long the spawner should wait before spawning the next Alien
The DATA table at the moment only contains the data for the first attackwave:
0 (AIRBORNE) This defines the movement pattern of the spawner itself, although we wont use it in this first instance
165 (X) the x coordinate of the spawner
8 (Y) the y coordinate of the spawner
2 (J) the sprite type number of the alien
2 (K) the sprite image number of the alien
5 (E) the number of aliens in this attack wave
12 (G) the number of cpu cycles to wait in between spawning the next alien
Before we test our progress, we need to initialise the SETTINGA value to 0 when Spawner is first generated
MENU: EVENTS > INITIALISE SPRITES
and add the highlighted code:
EVENT INITSPRITE

ADD 1 TO S				; increment the sprite counter

IF TYPE 1				; PHOTON TORPEDO
	LET SETTINGB = 0		; initialise the distance counter
ENDIF

IF TYPE 7				; SPAWNER
	LET SETTINGA = 0		; RESET SETTINGA
ENDIF
Let's run it and check all is as expected.
Yes, that seems ok
Now lets add the data for the next wave, this time we'll put the Spawner on the left of centre, In your spawner event add/update the highlighted code, this will add the data for the next wave/level
EVENT SPRITETYPE7

						; SPAWNER
						; ============

IF SETTINGA = 0			; first time we run this
	LET JUMPSPEED = 0		; reset the enemies spawned counter
	LET SETTINGB = 0		; reset the timer
	RESTORE				; start from the beginning of the data table
	REPEAT L				; get the data for this level
	READ AIRBORNE			; get the spawner movement
	READ X				; get starting x position
	READ Y				; get starting y position
	READ J				; get the enemy sprite type
	READ K				; get the enemy image
	READ E				; how many enemies in this level?
	READ G				; delay between releasing each enemy
	ENDREPEAT
	ADD 1 TO SETTINGA      ; prevent this running again
ENDIF


IF SETTINGB = G			; has timer reached the delay point?
	IF JUMPSPEED < E		; are there still enemies left to spawn?
		IF S <= 8	; are there 10 or less enemies already on screen?
			SPAWN J K			; spawn an enemy
			ADD 1 TO JUMPSPEED	; increment the number spawned
			SPAWNED				; switch to the enemy sprite
			LET DIRECTION = 0		; set its initial direction to 0
			ENDSPRITE			; retrun to the spawner
		ENDIF
	ELSE					; all enemies in this level have been spawned
		ADD 1 TO L		; get ready for next level
		IF L = 3			; have we reached the end of the levels?
			LET L = 1	; yes, start again
		ENDIF
		LET SETTINGA = 0	; GET DATA FOR NEXT LEVEL
	ENDIF
	LET SETTINGB = 0		; reset the timer
ENDIF

ADD 1 TO SETTINGB			; increment the timer


DATA  0 165 8 2 2 5 12 0 80 8 2 2 5 12
Now let's build it again:
{insert video}
OK, that's looking decent, we can see the first wave on the left then the second wave on the right, and the pattern keeps looping.
We're going to extend the capabilities of the Spawner later, but as you can see in the video above, the game has a fundamental problem, nothing happens when the player's torpedos hit the aliens.
So, we'll tackle that next....
PART 6: KILLING ALIENS


Comments